<?xml version="1.0" encoding="utf-8"?>

<feed xmlns="http://www.w3.org/2005/Atom">

    <title>Anton Fisher's notes</title>
    <subtitle>javascript, extjs, nodejs, bash</subtitle>
    <link href="https://antonfisher.com/feed.xml" rel="self"/>
    <link href="https://antonfisher.com/"/>
    <id>urn:uuid:c346da00-980f-11e5-a33f-0002a5d5c51b</id>
    <updated>2021-10-05T06:29:53Z</updated>


    <entry>
        <title>Meeting device: hardware</title>
        <link href="https://antonfisher.com/posts/2021/10/03/meeting-device-hardware/"/>
        <link rel="alternate" type="text/html" href="https://antonfisher.com/posts/2021/10/03/meeting-device-hardware/"/>
        <id>urn:uuid:-posts-2021-10-03-meeting-device-hardware</id>
        <updated>2021-10-03T00:00:00Z</updated>
        <summary>
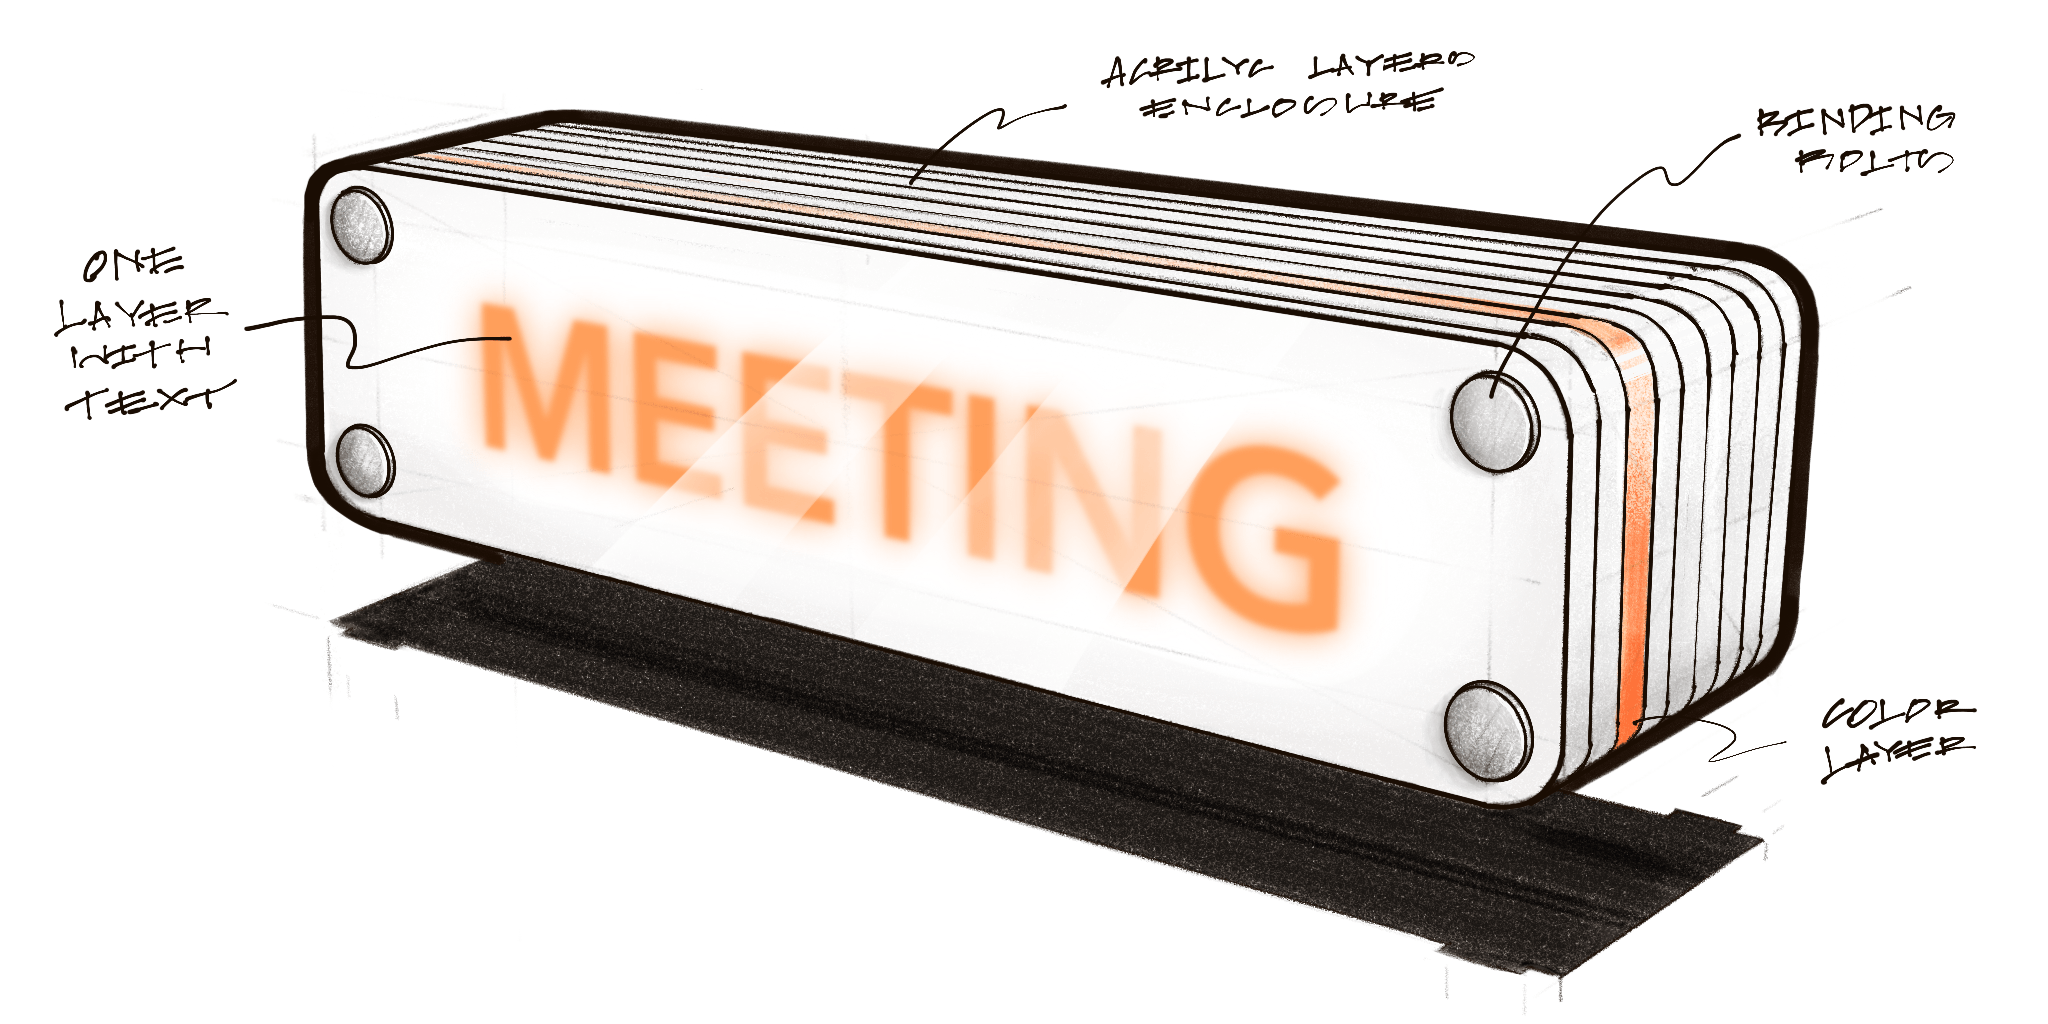
<p>This post goes through the hardware part of my “meeting device.”
The device is similar to the “ON AIR” light panels at radio studios, and the idea is to light it up when the computer has a camera or microphone active.</p>
</summary>
        <content type="xhtml">
            <div xmlns="http://www.w3.org/1999/xhtml">
                <img src="https://antonfisher.com/images/posts/2021-10-03-23-44-00-project-meeting-device-hardware/sketch-meeting-device-3d-ir.png" />
                
<p>This post goes through the hardware part of my “meeting device.”
The device is similar to the “ON AIR” light panels at radio studios, and the idea is to light it up when the computer has a camera or microphone active.</p>
...
            </div>
        </content>
        <author>
            <name>Anton Fisher</name>
            <email>a.fschr@gmail.com</email>
        </author>
    </entry>
    
    <entry>
        <title>How to animate native Electron window</title>
        <link href="https://antonfisher.com/posts/2020/12/27/how-to-animate-native-electron-window/"/>
        <link rel="alternate" type="text/html" href="https://antonfisher.com/posts/2020/12/27/how-to-animate-native-electron-window/"/>
        <id>urn:uuid:-posts-2020-12-27-how-to-animate-native-electron-window</id>
        <updated>2020-12-27T00:00:00Z</updated>
        <summary>
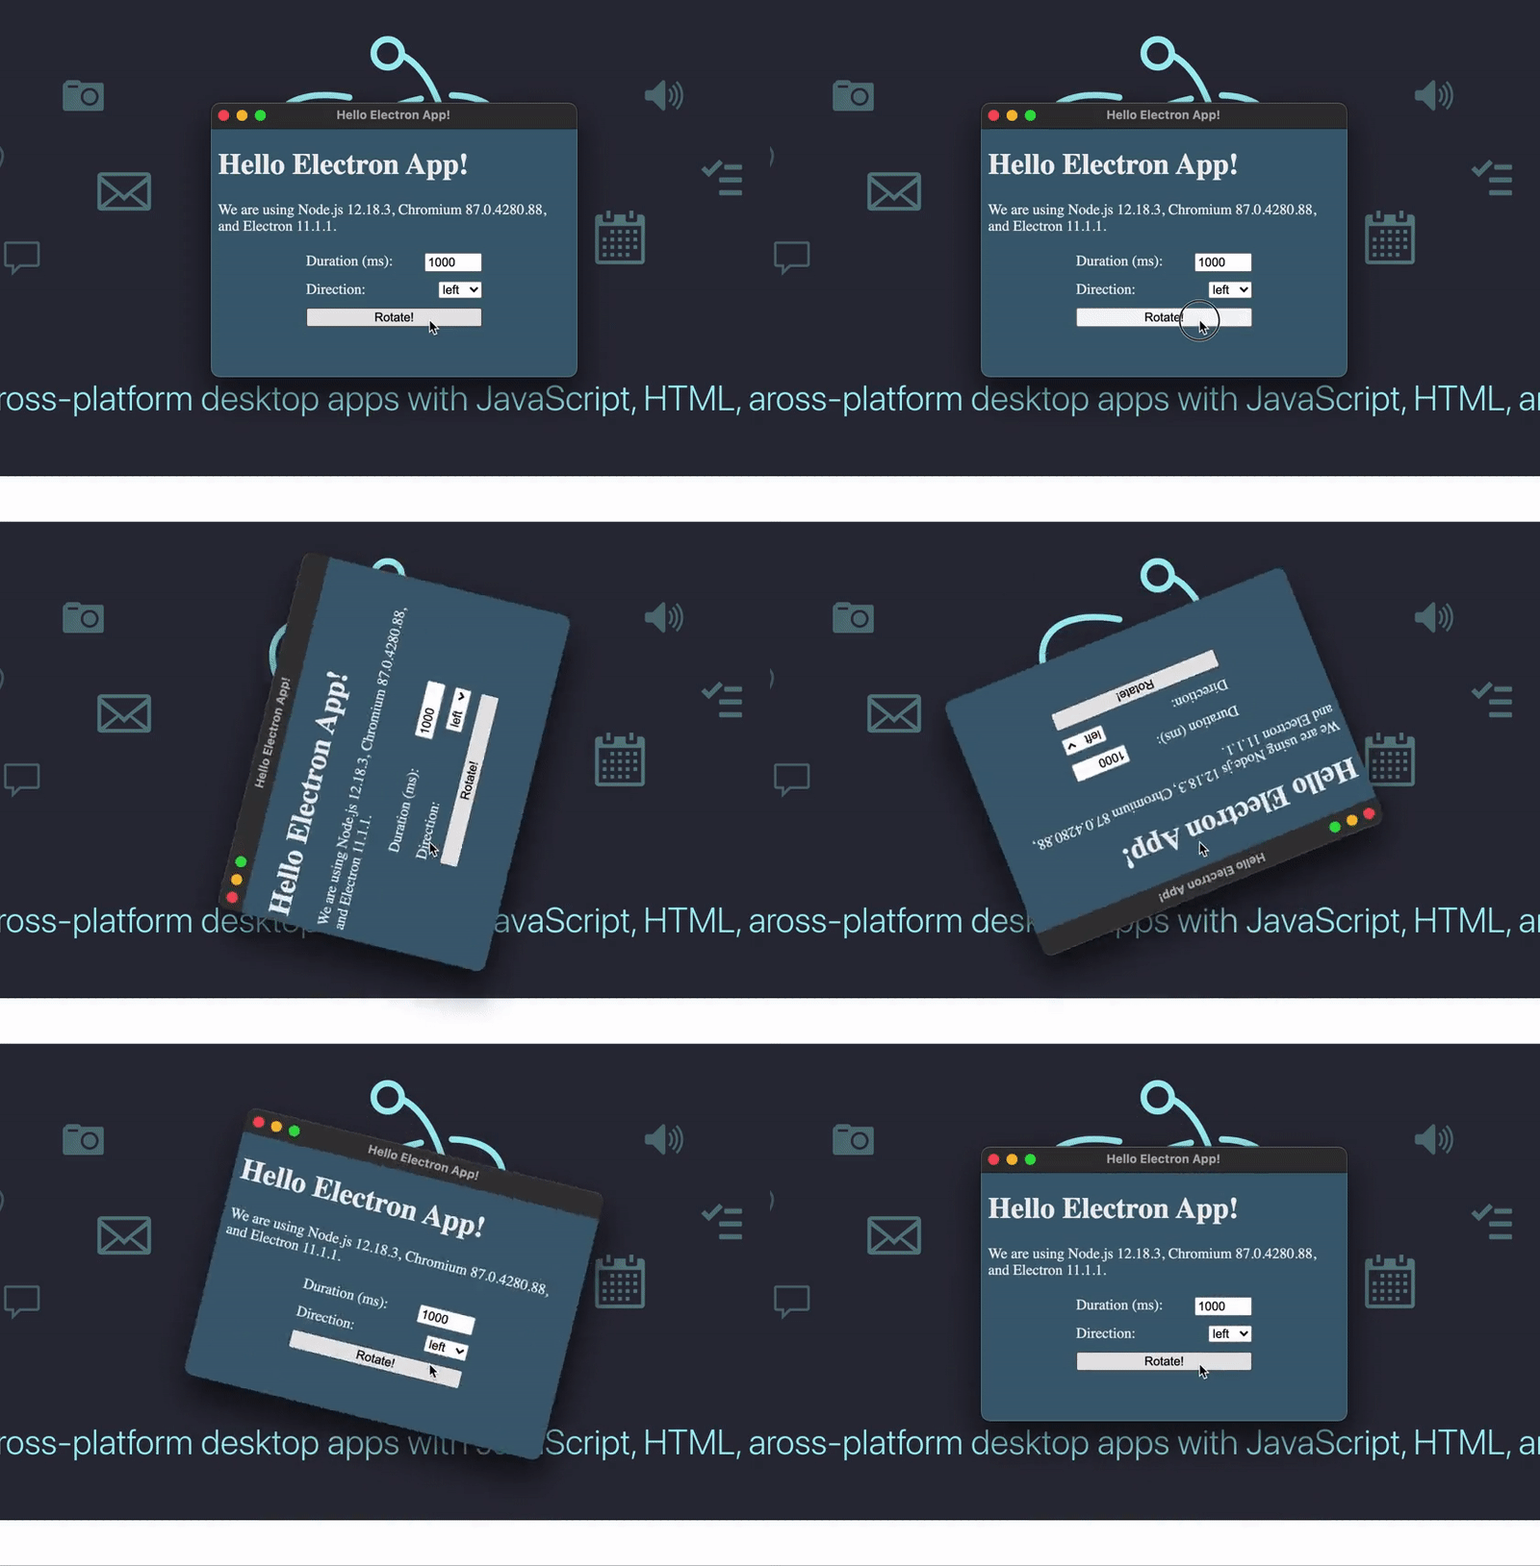
<p>This post demonstrates how to animate Electron’s native application window using native macOS API.</p>
</summary>
        <content type="xhtml">
            <div xmlns="http://www.w3.org/1999/xhtml">
                <img src="https://antonfisher.com/images/posts/2020-12-27-15-00-00-how-to-animate-native-electron-window/rotate-native-window-demo.gif" />
                
<p>This post demonstrates how to animate Electron’s native application window using native macOS API.</p>
...
            </div>
        </content>
        <author>
            <name>Anton Fisher</name>
            <email>a.fschr@gmail.com</email>
        </author>
    </entry>
    
    <entry>
        <title>Drive distributed storage on Raspberry Pi</title>
        <link href="https://antonfisher.com/posts/2018/12/14/drive-distributed-storage-on-raspberry-pi/"/>
        <link rel="alternate" type="text/html" href="https://antonfisher.com/posts/2018/12/14/drive-distributed-storage-on-raspberry-pi/"/>
        <id>urn:uuid:-posts-2018-12-14-drive-distributed-storage-on-raspberry-pi</id>
        <updated>2018-12-14T00:00:00Z</updated>
        <summary>
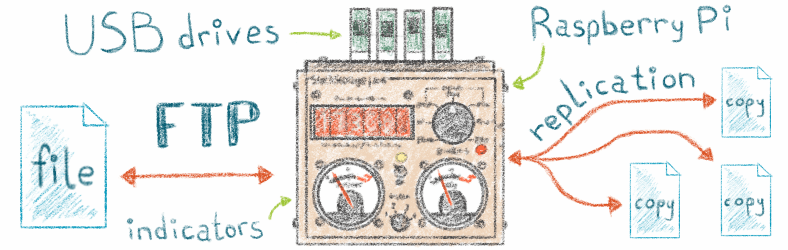
<p>The idea was to build a storage device with an easy way to increase its capacity and with data replication.
The device was built on top of Raspberry Pi with analog gauges, switches, and a display to indicate
and control storage state.</p>
</summary>
        <content type="xhtml">
            <div xmlns="http://www.w3.org/1999/xhtml">
                <img src="https://antonfisher.com/images/posts/10-raspberry-pi-storage/sloth-storage-logo.png" />
                
<p>The idea was to build a storage device with an easy way to increase its capacity and with data replication.
The device was built on top of Raspberry Pi with analog gauges, switches, and a display to indicate
and control storage state.</p>
...
            </div>
        </content>
        <author>
            <name>Anton Fisher</name>
            <email>a.fschr@gmail.com</email>
        </author>
    </entry>
    
    <entry>
        <title>Reducing Docker image size of a Node.js application</title>
        <link href="https://antonfisher.com/posts/2018/03/19/reducing-docker-image-size-of-a-node-js-application/"/>
        <link rel="alternate" type="text/html" href="https://antonfisher.com/posts/2018/03/19/reducing-docker-image-size-of-a-node-js-application/"/>
        <id>urn:uuid:-posts-2018-03-19-reducing-docker-image-size-of-a-node-js-application</id>
        <updated>2018-03-19T00:00:00Z</updated>
        <summary>
<p>Working on a <em>Node.js</em> application I noticed that deploying its image sometimes takes more time then I want it to.
I started digging into the problem and here are two steps to drop <em>Docker</em> image size down from <strong>948MB</strong> to <strong>79MB</strong>!</p>
</summary>
        <content type="xhtml">
            <div xmlns="http://www.w3.org/1999/xhtml">
                <img src="https://antonfisher.com/images/posts/9-reducing-docker-image-size-of-a-node-js-application/docker-image-sizes-logo.png" />
                
<p>Working on a <em>Node.js</em> application I noticed that deploying its image sometimes takes more time then I want it to.
I started digging into the problem and here are two steps to drop <em>Docker</em> image size down from <strong>948MB</strong> to <strong>79MB</strong>!</p>
...
            </div>
        </content>
        <author>
            <name>Anton Fisher</name>
            <email>a.fschr@gmail.com</email>
        </author>
    </entry>
    
    <entry>
        <title>Run Jenkins in Docker container with persistent configuration</title>
        <link href="https://antonfisher.com/posts/2017/01/16/run-jenkins-in-docker-container-with-persistent-configuration/"/>
        <link rel="alternate" type="text/html" href="https://antonfisher.com/posts/2017/01/16/run-jenkins-in-docker-container-with-persistent-configuration/"/>
        <id>urn:uuid:-posts-2017-01-16-run-jenkins-in-docker-container-with-persistent-configuration</id>
        <updated>2017-01-16T00:00:00Z</updated>
        <summary>
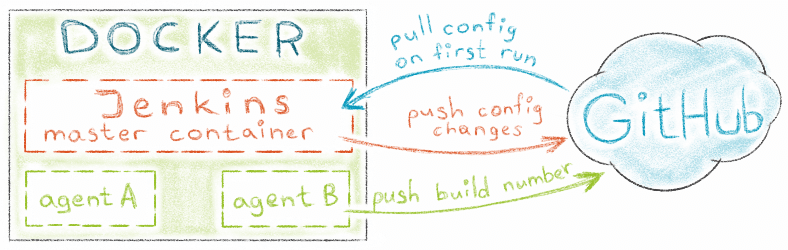
<p>One day you realised that you lost both disks in the <em>RAID</em> mirror and your <em>Jenkins</em> has gone forever.
And it is a good chance to build new robust <em>Jenkins</em> architecture!</p>
<p>This post is about <em>Jenkins</em>, <em>Docker</em> and storing <em>Jenkins</em> configuration on the <em>GitHub</em>.</p>
</summary>
        <content type="xhtml">
            <div xmlns="http://www.w3.org/1999/xhtml">
                <img src="https://antonfisher.com/images/posts/8-run-jenkins-in-docker-container-with-persistent-configuration/run-jenkins-in-docker-container-with-persistent-configuration-logo.png" />
                
<p>One day you realised that you lost both disks in the <em>RAID</em> mirror and your <em>Jenkins</em> has gone forever.
And it is a good chance to build new robust <em>Jenkins</em> architecture!</p>
<p>This post is about <em>Jenkins</em>, <em>Docker</em> and storing <em>Jenkins</em> configuration on the <em>GitHub</em>.</p>
...
            </div>
        </content>
        <author>
            <name>Anton Fisher</name>
            <email>a.fschr@gmail.com</email>
        </author>
    </entry>
    
    <entry>
        <title>Using SVG icons in ExtJs</title>
        <link href="https://antonfisher.com/posts/2016/06/06/using-svg-icons-in-extjs/"/>
        <link rel="alternate" type="text/html" href="https://antonfisher.com/posts/2016/06/06/using-svg-icons-in-extjs/"/>
        <id>urn:uuid:-posts-2016-06-06-using-svg-icons-in-extjs</id>
        <updated>2016-06-06T00:00:00Z</updated>
        <summary>
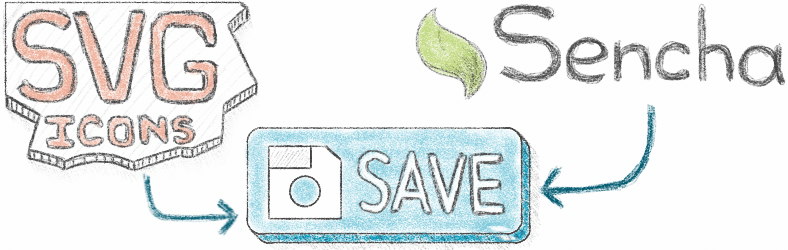
<p>In this issue we will figure out how to use any <em>SVG</em> icons in <em>ExtJs</em> buttons.
All icons will be combined to a single sprite that injected to <code>index.html</code>.
Example uses <em>Google Icons</em> set.</p>
</summary>
        <content type="xhtml">
            <div xmlns="http://www.w3.org/1999/xhtml">
                <img src="https://antonfisher.com/images/posts/7-using-svg-icons-in-extjs/using-svg-icons-in-extjs-logo.png" />
                
<p>In this issue we will figure out how to use any <em>SVG</em> icons in <em>ExtJs</em> buttons.
All icons will be combined to a single sprite that injected to <code>index.html</code>.
Example uses <em>Google Icons</em> set.</p>
...
            </div>
        </content>
        <author>
            <name>Anton Fisher</name>
            <email>a.fschr@gmail.com</email>
        </author>
    </entry>
    
    <entry>
        <title>Testing ExtJs with Mocha.js</title>
        <link href="https://antonfisher.com/posts/2016/05/02/testing-extjs-with-mocha-js/"/>
        <link rel="alternate" type="text/html" href="https://antonfisher.com/posts/2016/05/02/testing-extjs-with-mocha-js/"/>
        <id>urn:uuid:-posts-2016-05-02-testing-extjs-with-mocha-js</id>
        <updated>2016-05-02T00:00:00Z</updated>
        <summary>
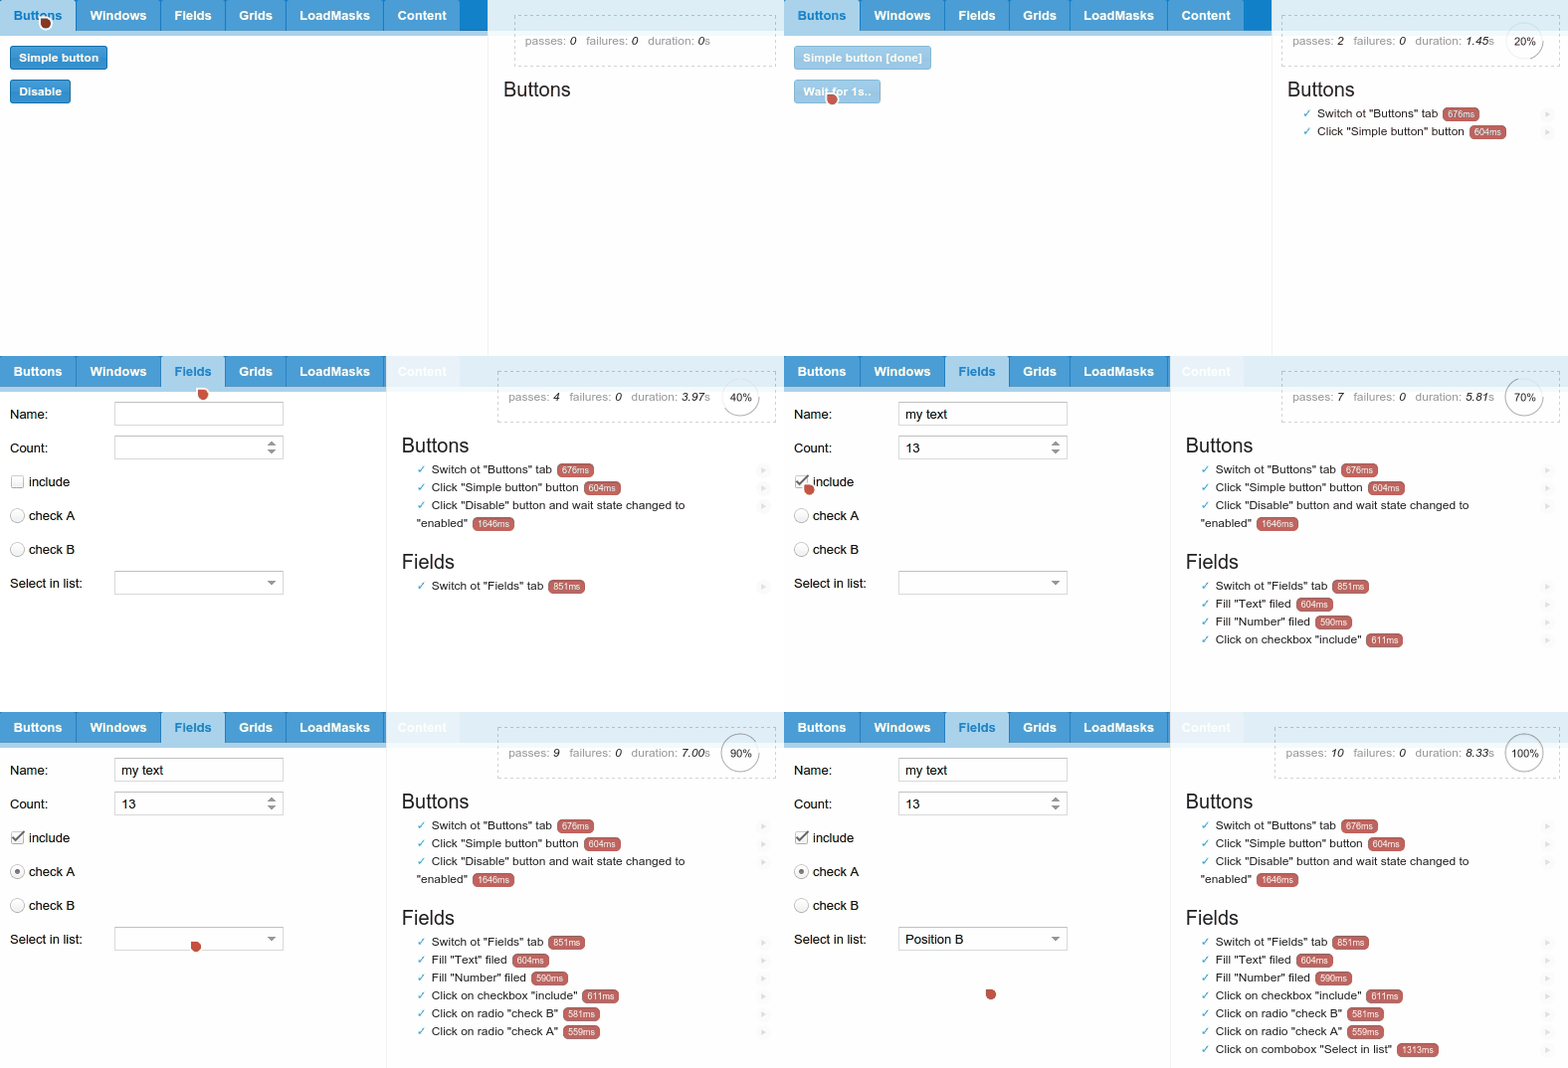
<p>At least two enterprise solutions exists for testing <em>ExtJs</em> applications.
They have rich user interface and functionality:
<em><a href="http://www.bryntum.com/products/siesta/">Siesta</a></em> (<em>Bryntum</em>)
and new <em><a href="https://www.sencha.com/products/test/">Sencha Test</a></em>.
In contrast to them, here I present small library that allows testing <em>ExtJs</em> application.
It uses great open-source <em>Mocha.js</em> framework and <em>PhantomJs</em> for nightly builds.</p>
</summary>
        <content type="xhtml">
            <div xmlns="http://www.w3.org/1999/xhtml">
                <img src="https://antonfisher.com/images/posts/5-testing-extjs-with-mocha-js/mocha-extjs-demo.gif" />
                
<p>At least two enterprise solutions exists for testing <em>ExtJs</em> applications.
They have rich user interface and functionality:
<em><a href="http://www.bryntum.com/products/siesta/">Siesta</a></em> (<em>Bryntum</em>)
and new <em><a href="https://www.sencha.com/products/test/">Sencha Test</a></em>.
In contrast to them, here I present small library that allows testing <em>ExtJs</em> application.
It uses great open-source <em>Mocha.js</em> framework and <em>PhantomJs</em> for nightly builds.</p>
...
            </div>
        </content>
        <author>
            <name>Anton Fisher</name>
            <email>a.fschr@gmail.com</email>
        </author>
    </entry>
    
    <entry>
        <title>Build distribution tool for SenchaCMD</title>
        <link href="https://antonfisher.com/posts/2016/03/25/build-distribution-tool-for-senchacmd/"/>
        <link rel="alternate" type="text/html" href="https://antonfisher.com/posts/2016/03/25/build-distribution-tool-for-senchacmd/"/>
        <id>urn:uuid:-posts-2016-03-25-build-distribution-tool-for-senchacmd</id>
        <updated>2016-03-25T00:00:00Z</updated>
        <summary>
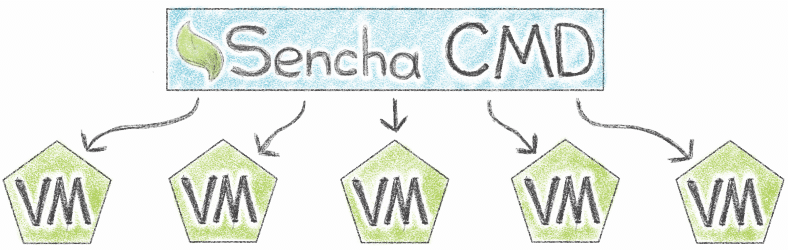
<p>Building <em>ExtJS</em> application with <em>SenchaCMD</em> takes about one minute on my 4-cores laptop.
In current project we have about 20 <em>ExtJS</em> applications that are included into one main application
(an architectural requirement).
So, when I am building whole app, I should take 20-minutes coffee break.
Sounds not so bad? Not after third cup :)</p>
</summary>
        <content type="xhtml">
            <div xmlns="http://www.w3.org/1999/xhtml">
                <img src="https://antonfisher.com/images/posts/6-sencha-cdm-distrubured-build/dscmd-logo.png" />
                
<p>Building <em>ExtJS</em> application with <em>SenchaCMD</em> takes about one minute on my 4-cores laptop.
In current project we have about 20 <em>ExtJS</em> applications that are included into one main application
(an architectural requirement).
So, when I am building whole app, I should take 20-minutes coffee break.
Sounds not so bad? Not after third cup :)</p>
...
            </div>
        </content>
        <author>
            <name>Anton Fisher</name>
            <email>a.fschr@gmail.com</email>
        </author>
    </entry>
    
    <entry>
        <title>ExtJS 5: disable app.json caching</title>
        <link href="https://antonfisher.com/posts/2016/02/05/extjs-5-disable-app-json-caching/"/>
        <link rel="alternate" type="text/html" href="https://antonfisher.com/posts/2016/02/05/extjs-5-disable-app-json-caching/"/>
        <id>urn:uuid:-posts-2016-02-05-extjs-5-disable-app-json-caching</id>
        <updated>2016-02-05T00:00:00Z</updated>
        <summary>
<p>By default <em>ExtJS 5</em> enabled cache for <code>app.json</code> (or I am wrong?).
In some cases you get old version from browser cache, even after new build.</p>
</summary>
        <content type="xhtml">
            <div xmlns="http://www.w3.org/1999/xhtml">
                <img src="https://antonfisher.com/images/posts/4-extjs-5-disable-app-json-caching/extjs-logo.png" />
                
<p>By default <em>ExtJS 5</em> enabled cache for <code>app.json</code> (or I am wrong?).
In some cases you get old version from browser cache, even after new build.</p>
...
            </div>
        </content>
        <author>
            <name>Anton Fisher</name>
            <email>a.fschr@gmail.com</email>
        </author>
    </entry>
    
    <entry>
        <title>Make Raspberry Pi Jenkins traffic light</title>
        <link href="https://antonfisher.com/posts/2016/01/05/make-raspberry-pi-jenkins-traffic-light/"/>
        <link rel="alternate" type="text/html" href="https://antonfisher.com/posts/2016/01/05/make-raspberry-pi-jenkins-traffic-light/"/>
        <id>urn:uuid:-posts-2016-01-05-make-raspberry-pi-jenkins-traffic-light</id>
        <updated>2016-01-05T00:00:00Z</updated>
        <summary>
<p>It is the simple instruction for javascript developers how to make physical Jenkins traffic light.
This device can be good first experience with the Raspberry Pi and it is useful for controlling your build’s health!</p>
</summary>
        <content type="xhtml">
            <div xmlns="http://www.w3.org/1999/xhtml">
                <img src="https://antonfisher.com/images/posts/3-make-raspberry-pi-jenkins-traffic-light/traffic-light-demo.gif" />
                
<p>It is the simple instruction for javascript developers how to make physical Jenkins traffic light.
This device can be good first experience with the Raspberry Pi and it is useful for controlling your build’s health!</p>
...
            </div>
        </content>
        <author>
            <name>Anton Fisher</name>
            <email>a.fschr@gmail.com</email>
        </author>
    </entry>
    
    <entry>
        <title>Bash: function converts relative file path to absolute</title>
        <link href="https://antonfisher.com/posts/2015/12/23/bash-function-converts-relative-file-path-to-absolute/"/>
        <link rel="alternate" type="text/html" href="https://antonfisher.com/posts/2015/12/23/bash-function-converts-relative-file-path-to-absolute/"/>
        <id>urn:uuid:-posts-2015-12-23-bash-function-converts-relative-file-path-to-absolute</id>
        <updated>2015-12-23T00:00:00Z</updated>
        <summary>
<p>For converting relative path to absolute full path in scripts I use this simple function.
Also it works with path which contain '~’.</p>
</summary>
        <content type="xhtml">
            <div xmlns="http://www.w3.org/1999/xhtml">
                <img src="https://antonfisher.com/images/posts/2-bash-function-converts-relative-file-path-to-absolute/bash-terminal.png" />
                
<p>For converting relative path to absolute full path in scripts I use this simple function.
Also it works with path which contain '~’.</p>
...
            </div>
        </content>
        <author>
            <name>Anton Fisher</name>
            <email>a.fschr@gmail.com</email>
        </author>
    </entry>
    
    <entry>
        <title>How to find Raspberry Pi IP address (DHCP)</title>
        <link href="https://antonfisher.com/posts/2015/12/04/how-to-find-raspberry-pi-ip-address-dhcp/"/>
        <link rel="alternate" type="text/html" href="https://antonfisher.com/posts/2015/12/04/how-to-find-raspberry-pi-ip-address-dhcp/"/>
        <id>urn:uuid:-posts-2015-12-04-how-to-find-raspberry-pi-ip-address-dhcp</id>
        <updated>2015-12-04T00:00:00Z</updated>
        <summary>
<p>I got my first Raspberry Pi.</p>
<p>I do not have a display and a keyboard that make OS installation process simple.
After some search, I found
<a href="http://raspberrypi.stackexchange.com/questions/15192/installing-raspbian-from-noobs-without-display">solution</a>
which uses preconfigured SD card using a laptop. Used <em>NOOBS v1.5.0</em> with changed <em>recovery.cmdline</em> file.</p>
</summary>
        <content type="xhtml">
            <div xmlns="http://www.w3.org/1999/xhtml">
                <img src="https://antonfisher.com/images/posts/1-how-to-find-raspberry-pi-ip-address/raspberry-pi.png" />
                
<p>I got my first Raspberry Pi.</p>
<p>I do not have a display and a keyboard that make OS installation process simple.
After some search, I found
<a href="http://raspberrypi.stackexchange.com/questions/15192/installing-raspbian-from-noobs-without-display">solution</a>
which uses preconfigured SD card using a laptop. Used <em>NOOBS v1.5.0</em> with changed <em>recovery.cmdline</em> file.</p>
...
            </div>
        </content>
        <author>
            <name>Anton Fisher</name>
            <email>a.fschr@gmail.com</email>
        </author>
    </entry>
    

</feed>