
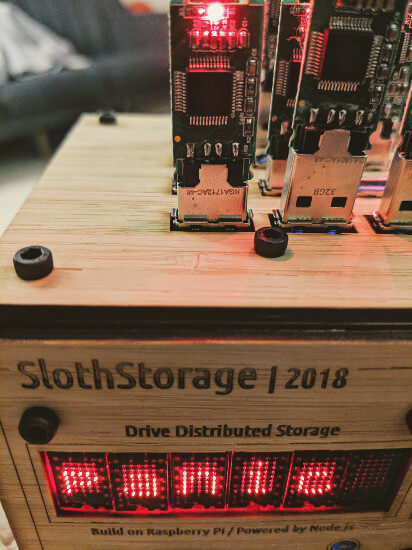
Drive distributed storage on Raspberry Pi
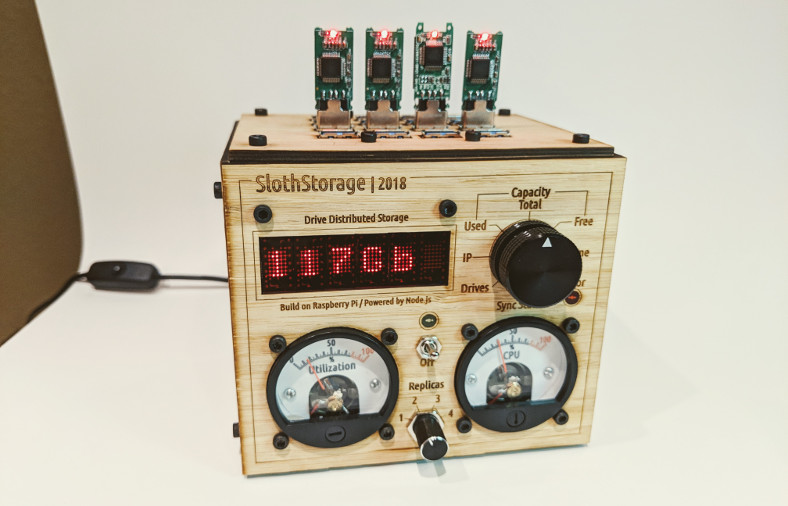
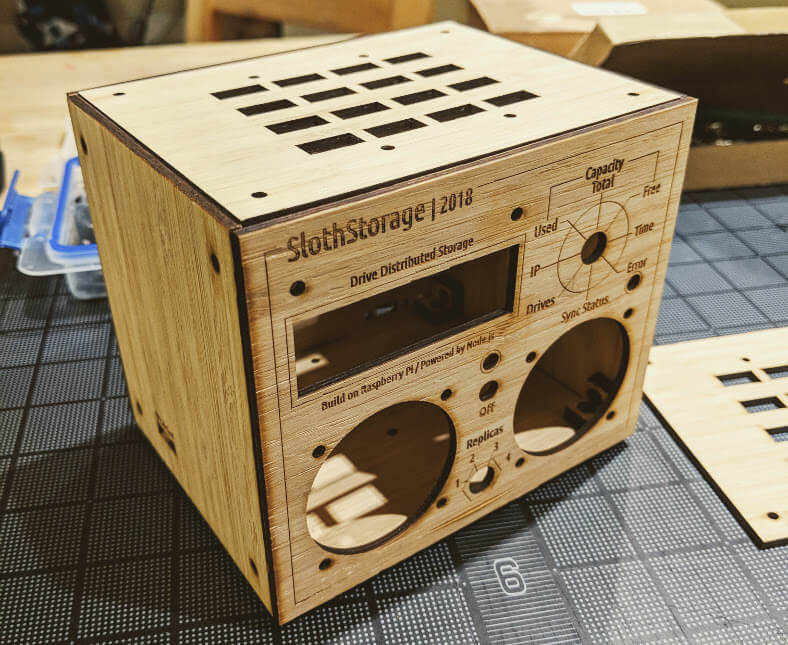
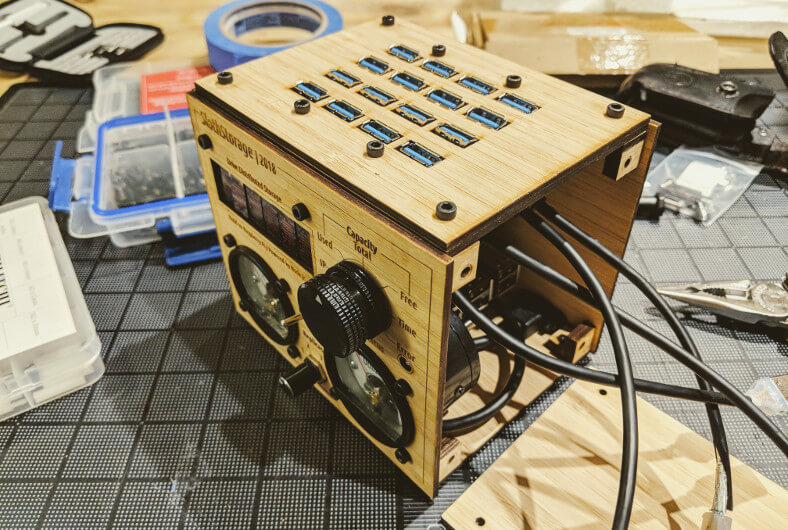
The idea was to build a storage device with an easy way to increase its capacity and with data replication. The device was built on top of Raspberry Pi with analog gauges, switches, and a display to indicate and control storage state.
What is this?
This is a stand-alone storage device, that can connect to WiFi and provides FTP interface to access files remotely. When a client copies a file to the storage, this file gets replicated to different USB drivers. If the client removes some file, it gets removed from all the USB drives.
There are two options when the storage is almost full:
- plug in a new USB drive (the storage will utilize the new drive)
- decrease replication count using "Replicas" selector and get more storage space but with losing reliability.
Replication count selector ("Replicas") has four positions (1-4) to choose the value. There are two analog gauges, the first one is for storage utilization, and the second one is for CPU usage. On/Off toggle switch in the final version enables and disables FTP server The yellow LED indicates storage IO, and the red LED indicates that an error occurred.
Main display switch has eight positions:
- Total/free/used capacity – storage capacity metrics
- Time – current device time (if it’s frozen then your NodeJS event loop got blocked :)
- Error – scrolls the last error message
- Sync Status – shows replication queue length (the number of files to be replicated/removed to reach the desired state)
- Drives – the count of detected drivers
- IP – scrolls device IP address.
Hardware
Almost complete list of used components:
- 1 x RPi 3 (ID:3055) = $35.00
- 1 x Pimoroni Micro Dot pHAT with Included LED Modules - Red (ID:3248) = $29.95
- 4 x USB 3.0 4-Port USB Hub (eBay) = $16.40
- 1 x 8GB Class 10 MicroSD Memory Card (ID:2692) = $9.95
- 2 x DC 0-3V Analog Voltmeter (eBay) = $8.56
- 1 x Mini Panel Mount SPDT Toggle Switch (ID:3221) = $0.95
- 1 x Slim Metal Potentiometer Knob - 10mm Diameter x 10mm - T18 (ID:2058) = $1.90
- 1 x Solid Machined Metal Knob - 1" Diameter (ID:2056) = $3.95
- 2 x Mini 8-Way Rotary Selector Switch - SP8T (ID:2925) = $3.90
- 2 x LED diode - red and yellow
Items in the list which have an ID were purchased on adafruit.com.
Box
I found bamboo as a cheap and very nice looking material for DIY cases. Also wood is much easier to fix and adjust by cutting and sanding compare to metal.
Work started with measurements and blueprint preparing:
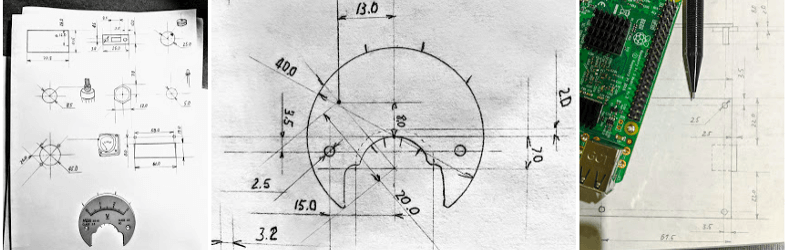
I prepared SVG files of the case and ordered laser cutting and engraving on ponoko.com.
After a while I got this:
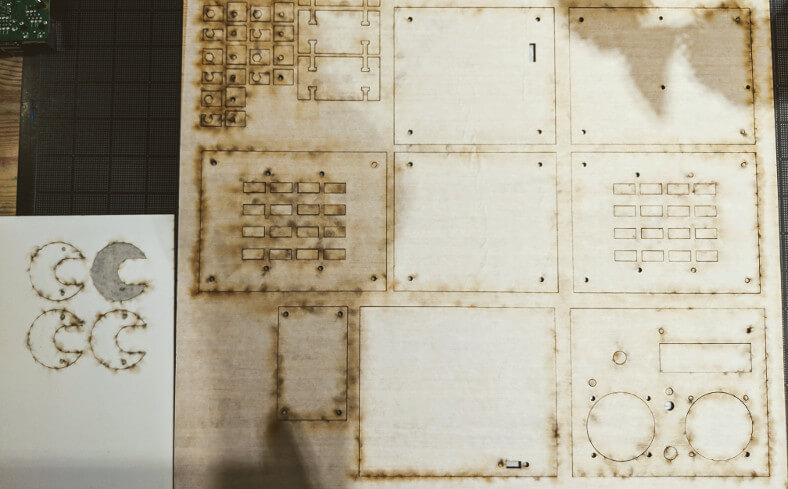 Ponoko sent it by mail.
All materials come covered with protection paper.
Ponoko sent it by mail.
All materials come covered with protection paper.
Box panels are pulled out, corner connectors are already glued together:
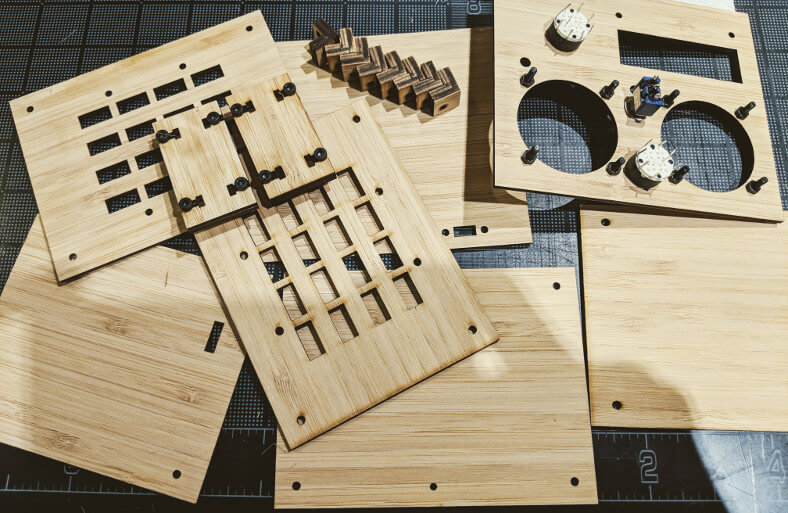
Panels adjustment and fitting:
Case SVG blueprints can be found here.
Analog gauges
First of all, I tried to print scale for analog gauges on a paper but was not satisfied by the result.
And in the end, I decided to order engraving on thin styrene white sheets (0.02 inches)
on the same website I used for the case.
Crayons appear to be an excellent option to paint engraved traces.
I made black and orange sections:
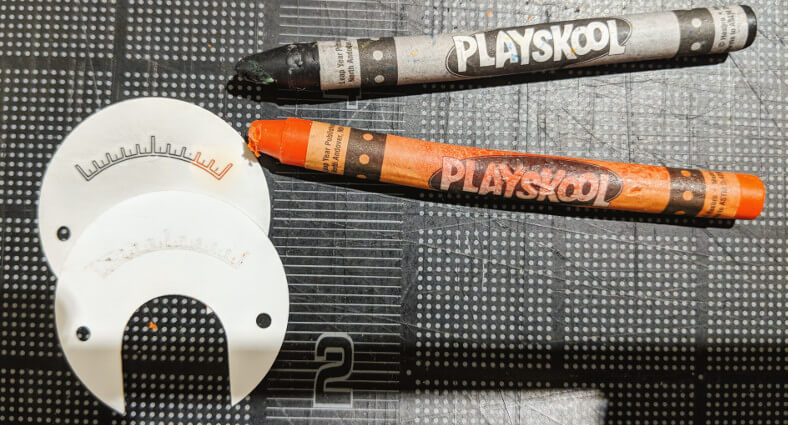
The result, before and after painting:
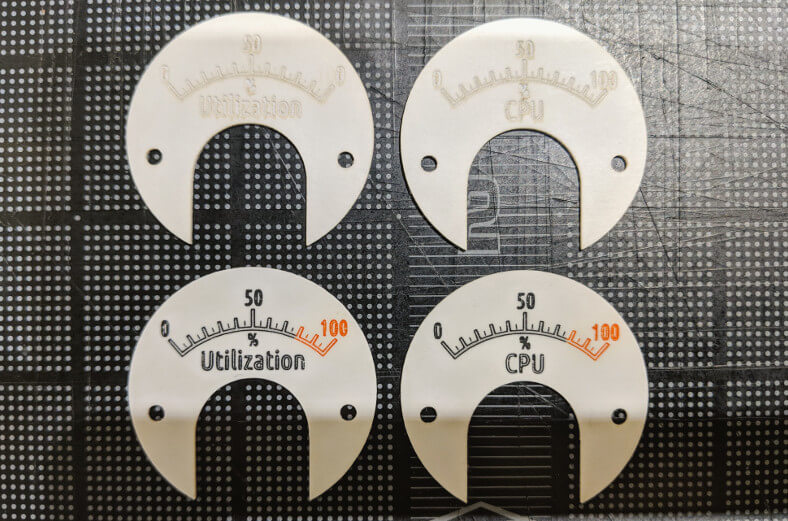
This is how it looks in-action inside voltmeter:
Analog gauge blueprints can be found here.
Display
I used Pimoroni Micro Dot pHAT as the only display on the device.
The display consists of six segments, and each segment has 5x7 dots (not assembled yet):
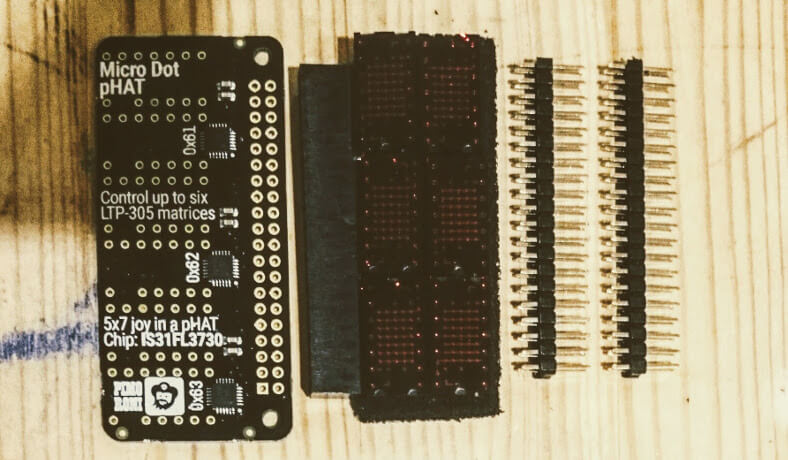 There is comprehensive Python library
that makes Micro Dot pHAT much easier to use.
The library supports: single dot turning on/off, printing text, and scrolling.
This is how it looks in-action (I used RPi Zero to debug display’s code):
There is comprehensive Python library
that makes Micro Dot pHAT much easier to use.
The library supports: single dot turning on/off, printing text, and scrolling.
This is how it looks in-action (I used RPi Zero to debug display’s code):
Assembling
Put the case and indicators together:
The case got packed with components, but still, the height could be decreased at least by 1cm (0.4 inches):
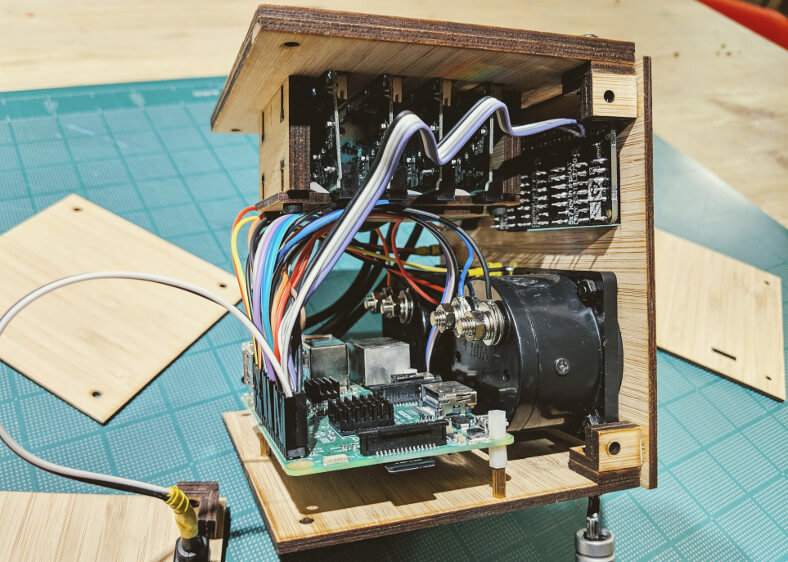
Raspberry Pi has 40-pins header, and the device uses almost all of them.
Also, all 4 Raspberry Pi’s USB ports were used by USB HUBs to increase the total port count to 16:

There is an issue with USB HUBs, it turned out that I could not use 3A power supply to power 16 USB ports and RPi itself. In my case, the maximum number of USB devices was 4-5, after this numbers they usually get unmounted randomly. When 10 USB drives are connected, Raspberry Pi seems to work fine, but only until any IO operation, then RPi completely cuts the power from all USB devices, and you have to re-mount them.
Application
The tech stack is JavaScript (Node.js) core application and small Python driver for the display. JS is not the best choice for this kind of programs but given the experimental nature of this project, figuring out the limitations of Node.js was interesting. The main rule there is to use only asynchronous functions in the application. This doesn’t block JS event loop, and application reacts fine on user interactions (switches, buttons). Still it’s impossible to get perfect execution timing required to manage some hardware components, but this wasn’t needed.
All USB drives connected for the first time:

I used rpio Node.js library that has basic API for setting levels on pins, as well as PWM control (for voltmeter gauges) and can execute callbacks on level change (pin as an input.)
Debug moment when the application fell to PANIC mode:
Conclusion
The storage is terribly slow, and this is the limitation of USB drives, it only can be used as a backup solution. However, there is a room for performance improvements, USB hard drives can help with increasing the speed, also, the application can be optimized to utilize all four Raspberry Pi cores (Node.js runs in a single process, currently only display driver runs in a separate process.)
There are some positive things there too. I like device’s bamboo case, and that I found the way to make such a thing, it definitely can find a place on shelves. Analog gauges look old and cool, it’s a clear way to indicate both, the current value and the possible range of some metric.
The takeaways from the experiment are:
- bamboo is a worthwhile material for DIY
- analog gauges is an excellent way for representing usage information
- keep an eye on the power consumption of all hardware components
- Node.js fits well for hacking projects when you are not lazy to follow its async guides.
As always, after finishing a project I came up with two ideas of what to do next!
Links
Good luck with hacking!