Meeting device: hardware
This post goes through the hardware part of my “meeting device.” The device is similar to the “ON AIR” light panels at radio studios, and the idea is to light it up when the computer has a camera or microphone active.
I’ve been working remotely for more than a year now (thanks to the virus :D), which quite changed our family’s everyday life. Bedrooms became offices, and family members, often without their will, made occasional presents at meetings. The idea was simple – make a device that indicates the risk of being an unintentional guest on somebody’s meeting.
The “ON AIR” light panels have been helping with the same problem at recording studios. They inspired that project.
In general, I tried to keep things simple as much as I could, not only because of KISS but also because hardware projects are already complicated by themselves (the price of design mistakes, production cost, time-consuming, etc…).
Goals
I set these goals before starting sketching the device:
- clean and simple design — Why? Easy to produce, looks professional
- fixed text and only two states: light on/off — Why? Colors, displays add complexity to the device configuration and program UI
- bluetooth connection to the laptop — Why? No need to come up with a way to share a wi-fi point password
- autonomous, work on a single change for a reasonable period of time — Why? While it contradicts simplicity, I also like devices to be independent and wire-free. (Though now being charging it for a while, I’m re-thinking this decision).
Electronics
After getting some sketches done (the first image), it was time to decide on internal components and figure out what parts I could get and how large / small / wide / narrow my device could be.
A sketch of the internals and how they are supposed to be packed in the device:
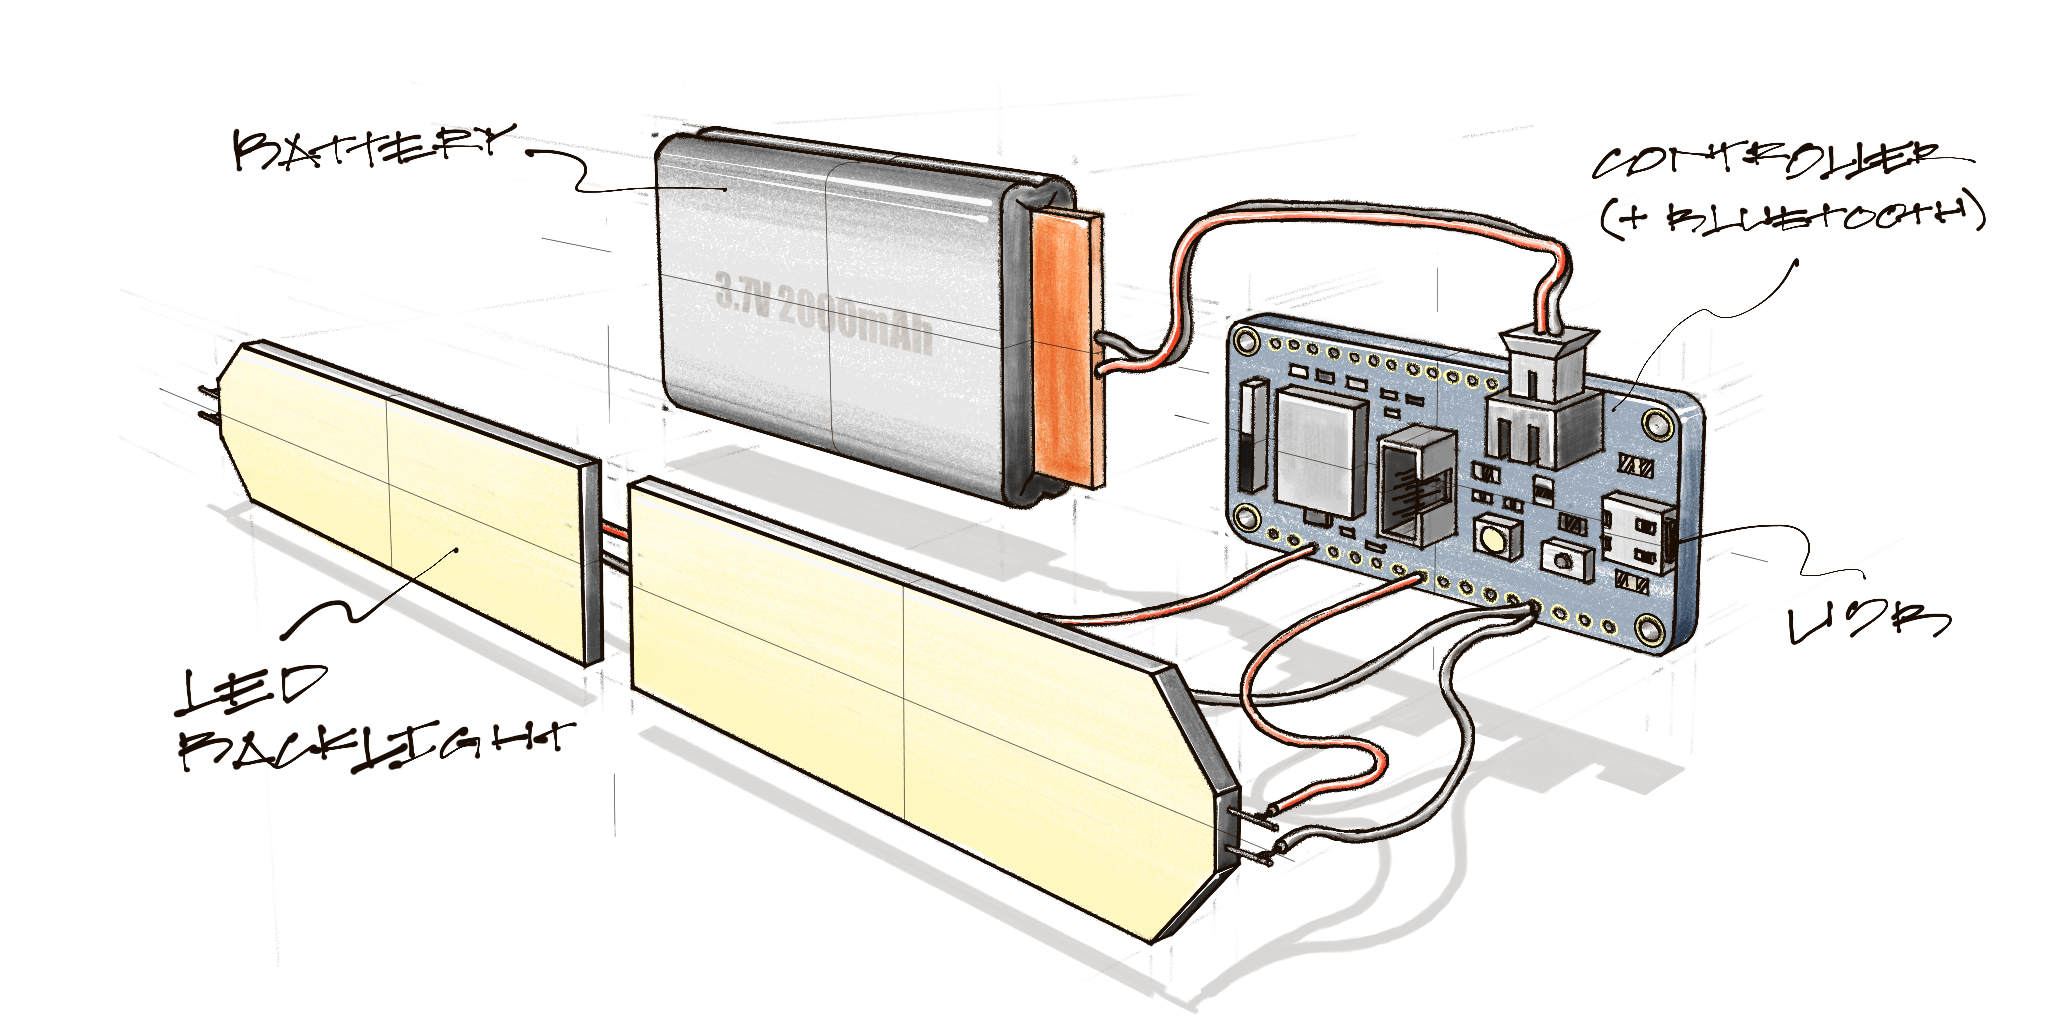
I decided to use Adafruit Feather nRF52840 Express board with an nRF52840 microcontroller from Nordic Semiconductor, bluetooth, and USB battery charging peripherals. Also, it is supported by TinyGo project – so I can program it with Go!
I am glad I found out about the existence of LED backlights. My first idea was to make a custom PCB with a bunch of LEDs on it in some kind of matrix, but scrolling through the website, I found backlights. These backlights solve several problems: light distribution under the text is even, and PBC design/production is no longer needed.
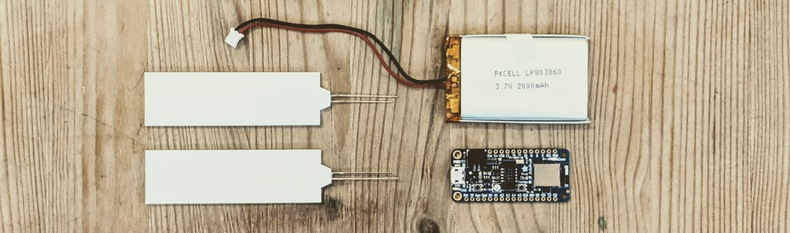
I ordered everything: controller, battery, and LED backlights from Adafruit website.
BOM:
- 1 x Adafruit Feather nRF52840 Express ID:4062 – $24.95
- 1 x Lithium Ion Battery - 3.7v 2000mAh ID:2011 – $12.50
- 2 x White LED Backlight Module - Medium 23mm x 75mm ID:1622 – $5.00.
Enclosure
I had positive experience using Ponoko service (enclosure example.) They provide a service to cut down various materials based on the uploaded SVG and then mail it to you.
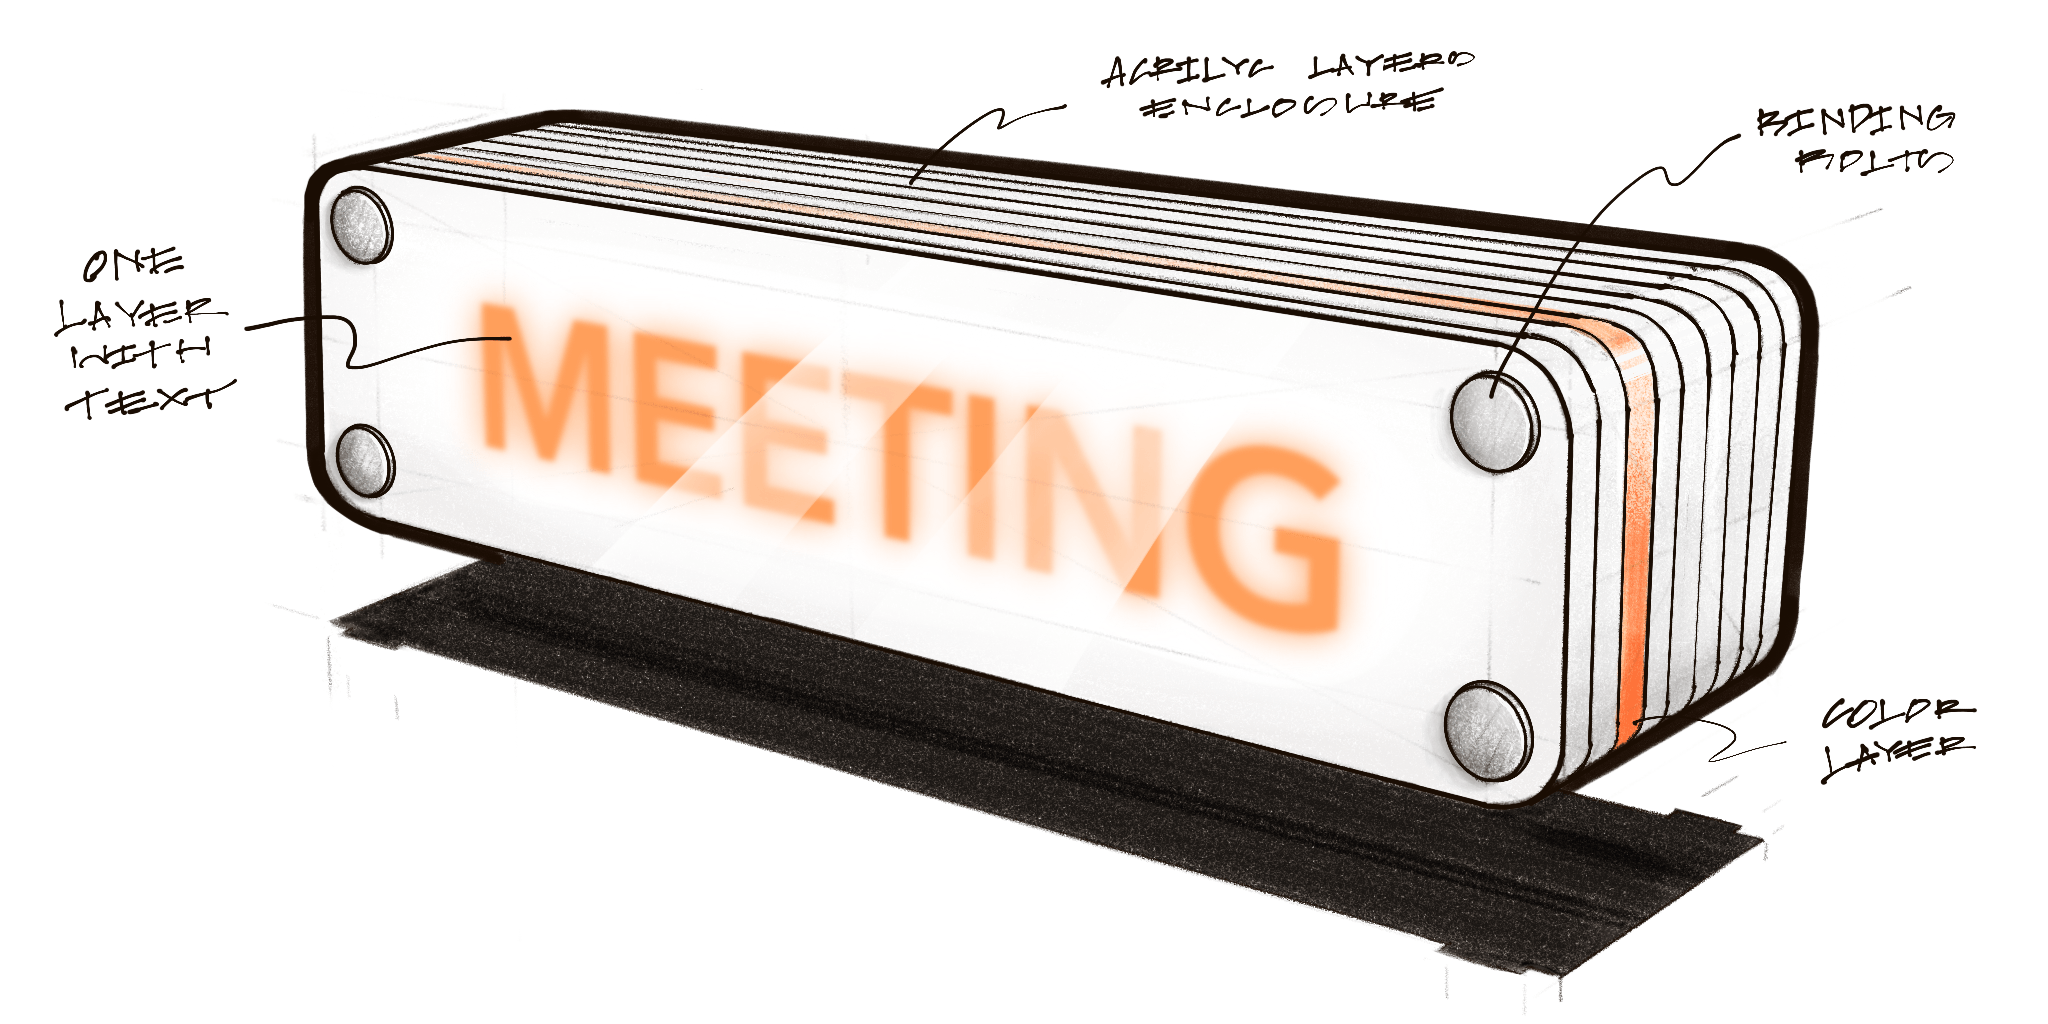
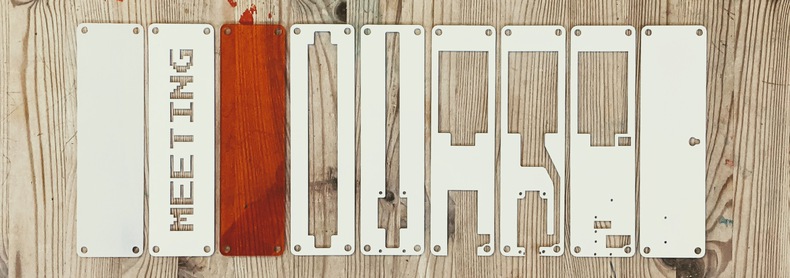
This sketch represents almost the final design of the device enclosure. I ended up cutting text from a non-translucent white (and black) acrylic sheet and coloring it with another layer, but still, the idea is similar:

I’ve build two versions of the device; one is white, another one is black. For the white one, I used acrylic with different transparency and colors:
- two opal acrylic layers (42% translucent) for the front and the back panels (blurs the light but hides internals)
- several opaque white acrylic layers (9% translucent) for the internal layers and text pattern
- single orange translucent acrylic for coloring the light.
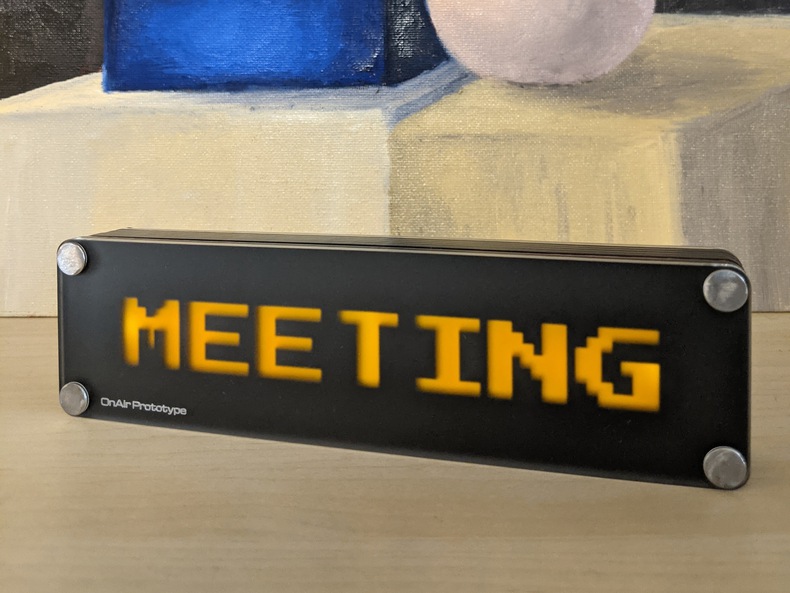
For the black one:
- black matte acrylic (all center panels)
- clear matte acrylic (for the front and back panels)
- single orange translucent acrylic for coloring the light.
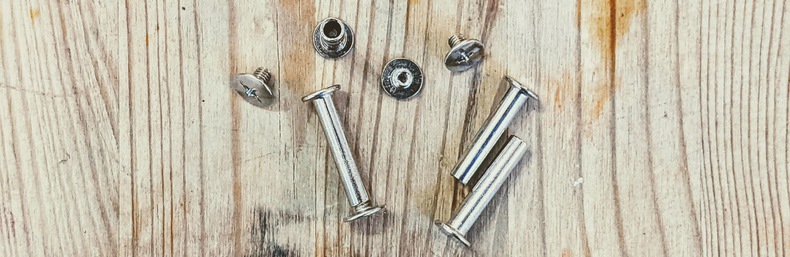
To keep device’s layers together, I used binding bolts for books and albums – they turned out to be a good fit for a job.
Result
Sneak-pick from the next part of the series:
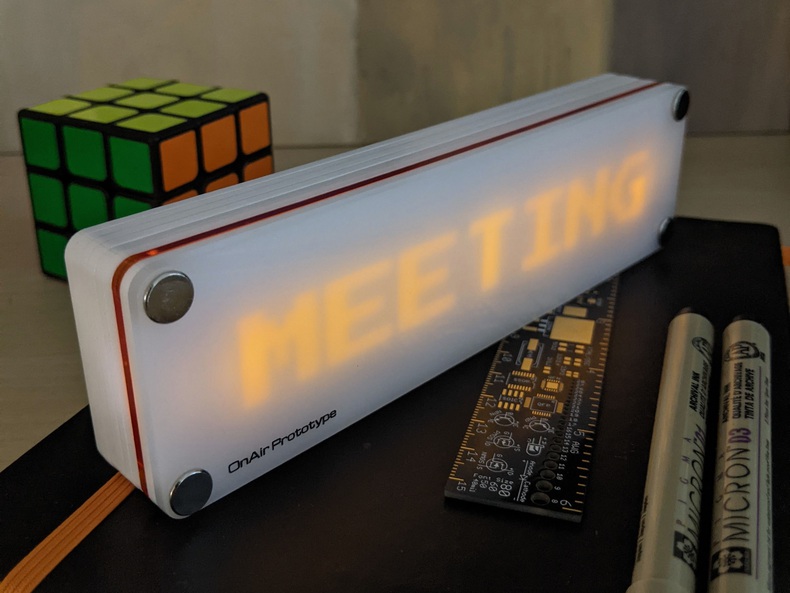
The device turned out to be looking good; I’m definitely keeping it on my desk, at least while working on firmware :D Also, I haven’t decided yet on what label I want to display. It can be either “meeting” or classic “on-air,” so I’ve cut both and will experiment with it.